
(Before I continue, I want to say that we received such heartfelt thank yous for the gifts. It was so much more than I expected and I even teared up reading an email from one of their teachers. And then one morning as I was dropping the girls off at school, their one guy teacher came over to the van to thank me for his gift (not a bag) and ask me questions about the bags. There was just a lot of holiday love flowing that week and it was such a nice offset to the buy-buy-buy and overconsumption that sometimes goes along with the season.)

Their French teacher loves France and everything French so we did go with a Parisian themed bag for her, but that was the only teaching subject related bag. This was a quilt-as-you-go style with the fabric strips sewn directly onto the fleece interfacing.

When I was laying out the fabric, deciding the order of the strips, I realized how white/light colored it all was and I feared it would get dirty quite easily so I added the blocking at the bottom, which was easy to do because I already had that black fabric on hand. It's somewhat stiff, almost like canvas. The idea to add the fabric detail to the straps came after seeing someone add ribbon/fabric to the middle of straps made from webbing. These straps are the same black fabric from the blocking.

For the llama lover . . .

Llamas are popular right now and there's a fair amount of llama fabric to choose from, but most of it has a desert theme and I didn't want a desert theme. I found this and thought it was perfect. Overall, I was really happy with how the coordinating fabrics looked when the project was finished.

This one was quilted using the masking tape method - see my notes below.

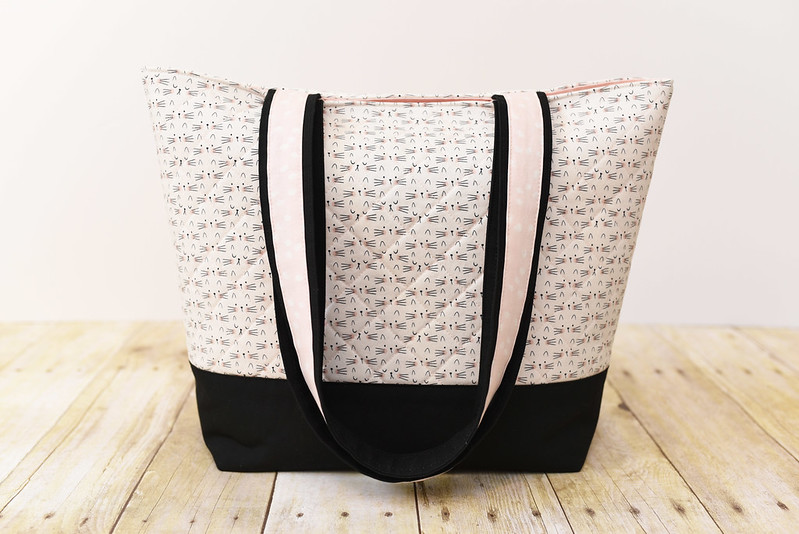
For the cat lover . . .
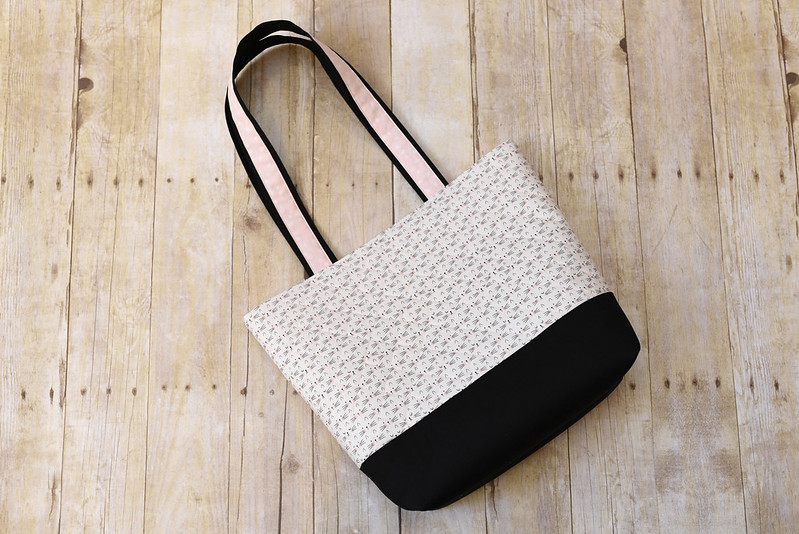
Those are tiny cat faces (you can see them better in the photo below) and this one was also quilted by me.
For the beach lover . . .

Tropical beach or New England beach? I was thinking of anchors and whales with reds and blues for a New England beach theme but tropical beach it was. And, yes, this does look very similar to my dance bag. This was also a quilt-as-you-go where the fabric is sewn directly onto the fleece interfacing.

This last one was the most difficult with respect to fabric selection. This is for someone who likes glitter/sparkles, cheetah/leopard print and pinks. A sassy bag! I didn't use any coordinating fabric or quilting, etc. because I felt like that fabric was enough on its own.

Pattern information and other stuff I've learned along the way:
* The bags themselves are fairly basic/standard but I did add more detail with quilting, etc. I used my own pattern (you can see a tutorial I wrote here.)
* For sizing, I cut the main interfacing pieces at 16 inches tall by 17.5 inches wide. I used the smoosh down method (described in the tutorial) for the boxing at the bottom corners. That measurement is 5 inches across. I cut the straps at 28 inches in the length. Finished straps are 1.5 inches wide.
* For the quilting on the llama and cat bags, I used masking tape as a guide to keep the lines straight and evenly spaced apart. This a trick I discovered online when I first started quilting. (After attaching the fabric to the interfacing, I place it on my cutting mat, which has different angle lines drawn on it. Line up a piece of masking tape along the angle line (for these, I used 45 degrees), and place it on the fabric. When you stitch the quilting, your machine foot should run next to the edge of the masking tape. When you finish stitching a row, remove the tape and place it along the line you just stitched.) Also, you can use the same piece of masking tape over and over until it doesn't stick at all. It really just needs to stick a little. I do have to add that when I need a fresh piece of tape, I de-stick it a little before using so it doesn't leave any residue on the fabric.
* On the first bag, I decided to use SF101 interfacing on the lining to give it more structure, which I haven't done in the past. After the birthing process (turning it all right side out) and topstitching (my machine doesn't have a lot of underside space), the lining looked so wrinkled. Gah! I ended up sticking an iron in the bag to smooth it out, but that had never happened to me before. Later, I was reading a sewing related blog post while I was researching flex foam and the author mentioned the very same issue with SF101. Apparently, I'm not the only one who has had fabric with that iron-on interfacing wrinkle up, especially while turning right side out.
* It sometimes feels like I spend just as much time cutting fabric as I do actually sewing the project together, which can be frustrating, but when I go to drop that lining in and it's a perfect fit, I remember that time spent cutting is definitely worth it.
Happy sewing!
3 comments:
Happy New Year!
These bags are gorgeous!
These are beautiful, and you are very talented! What lucky teachers. I hope your girls are picking up your sewing talents and are learning all of your sewing tricks. They will be so glad they did when they are older.
Thank you!!
I've always said that everyone should be able to sew on a button and hand stitch a hole. Good life skills to have.
Post a Comment