
In Part I, I had you think of ISO, aperture and shutter speed as a triangle. These three functions are connected to each other and do not work independently. So you can't just say, well, I want to keep my ISO low at 100 and I want a fast shutter speed, say 1/2500, and I really want bokeh so I'll just set my aperture for 2.8. Maybe that would work but chances are, it won't.
The thought of shooting in manual always intimidated me because I thought that you had to have settings memorized. You do not need to have settings memorized and we will discuss using the meter in your camera in this post.
I think the most asked questions when it comes to shooting in manual are:
"Where do I start?"
"What function (aperture, ISO, shutter speed) do I set first?"
"How do I know what to set my aperture, ISO and/or shutter speed to?"
In short, there is no correct answer, which is good. It gives you more options. Hopefully, I can explain why. Let's start with the pictures from Part I. I am going to talk about the settings so hopefully you can see how the three functions (ISO, aperture and shutter speed) work together.
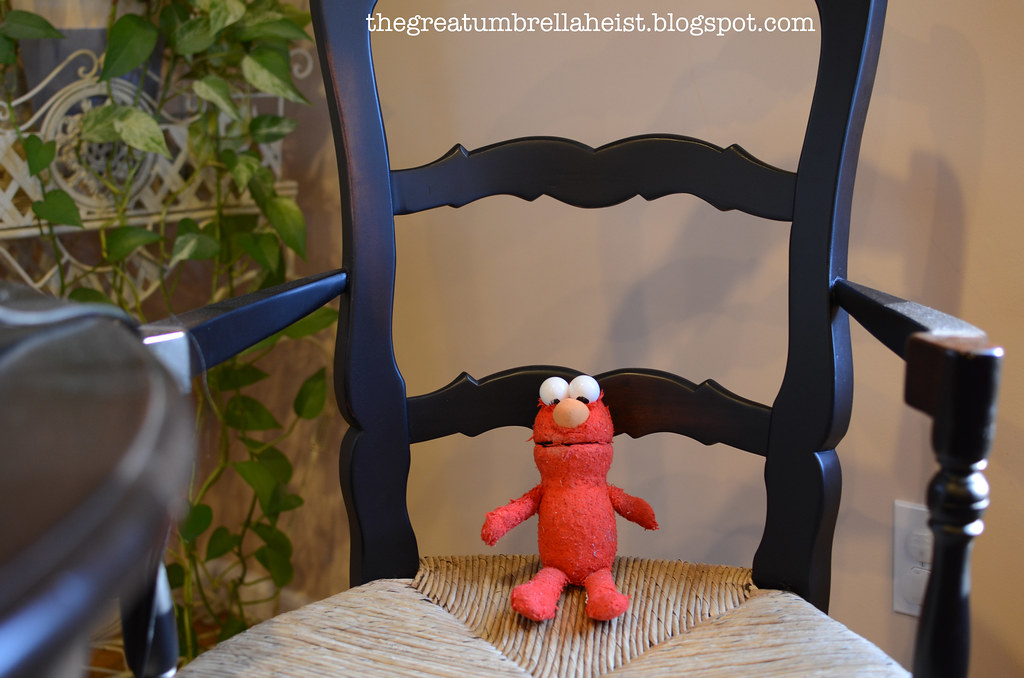
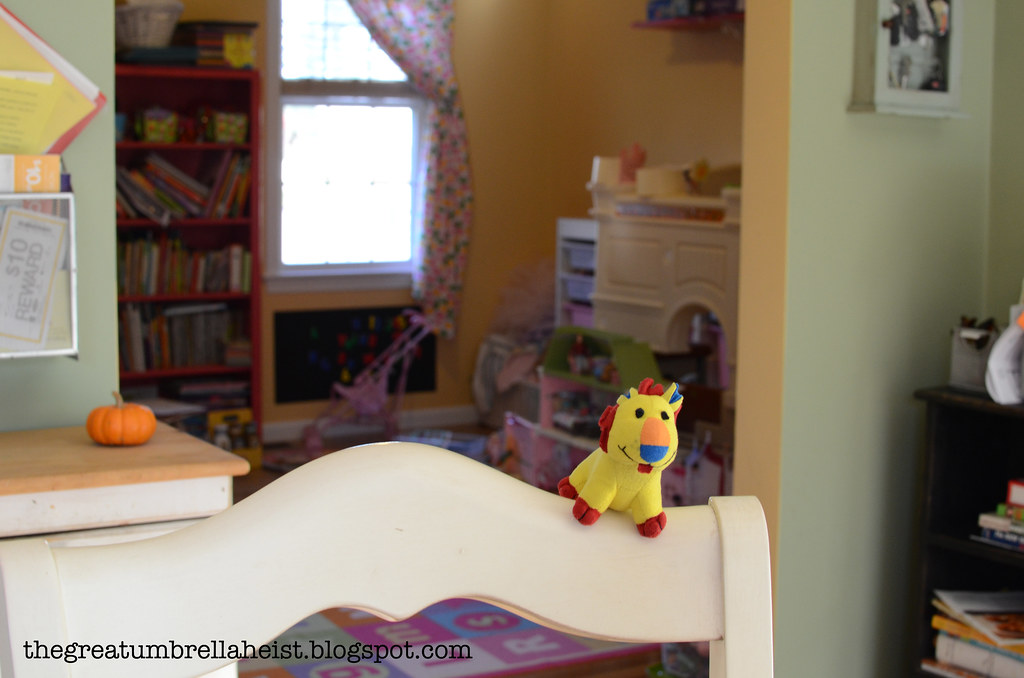
For this first one, I wanted to use a low ISO so I set that to 320. I then set my f stop to 2.8 so that the lens opening would be wide to let in light. I metered in my camera for the shutter speed that would properly expose the photo. That was 1/25, which is really super slow.
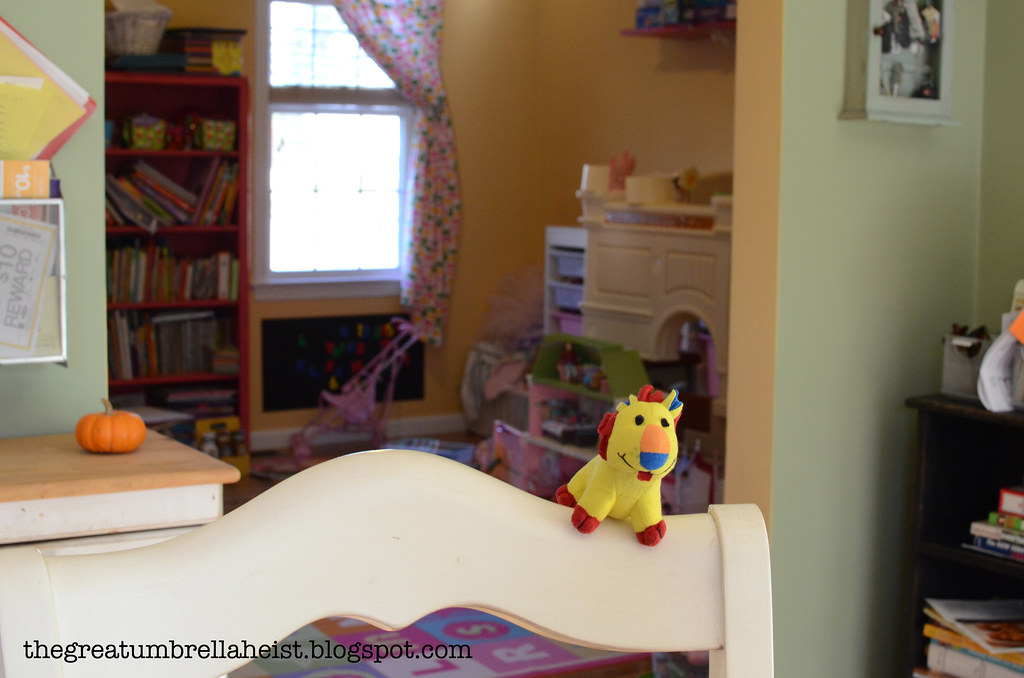
In order to achieve a faster shutter speed, I either had to increase my ISO or decrease my f stop. I wanted to leave my f stop at 2.8 for this example. By increasing my ISO to 4000, I was able to increase my shutter speed to 1/320 (by metering in the camera.)
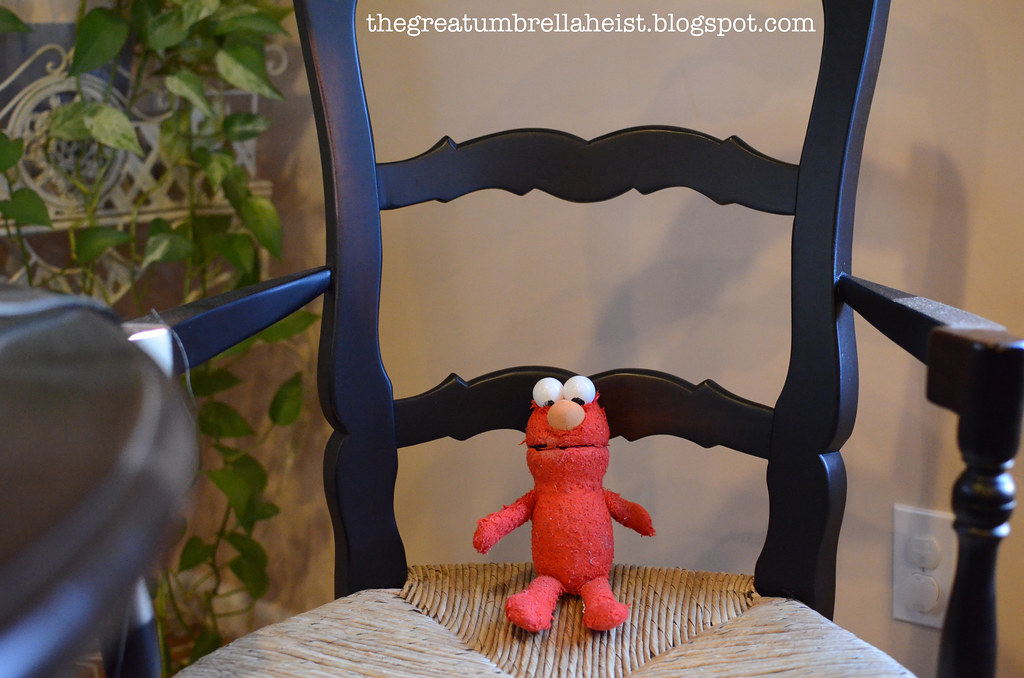
Aside from the increase in graininess, the two photos are almost identical.
Is this starting to make sense??
Now, let's look at the settings for my other example. In this first one, I wanted to keep my ISO low (to avoid grain) and my f stop low (for a blurry background and to let more light into the camera).
ISO - 100
Aperture - f/2.2
Shutter speed - 1/60
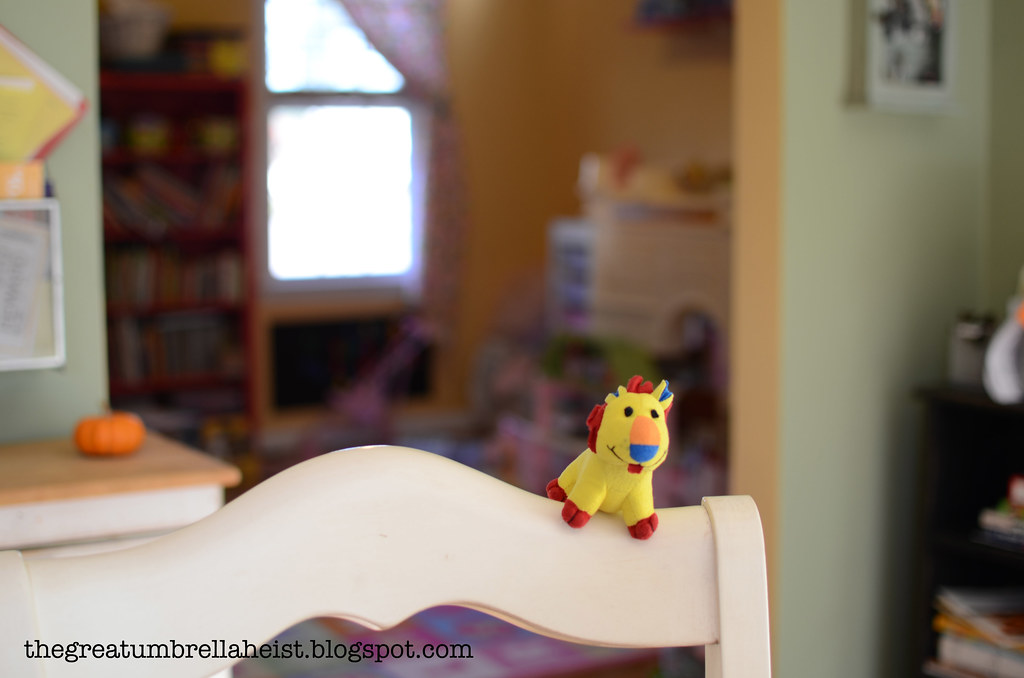
That's a pretty slow shutter speed and if children were in the picture, someone (most likely) would have been blurry.
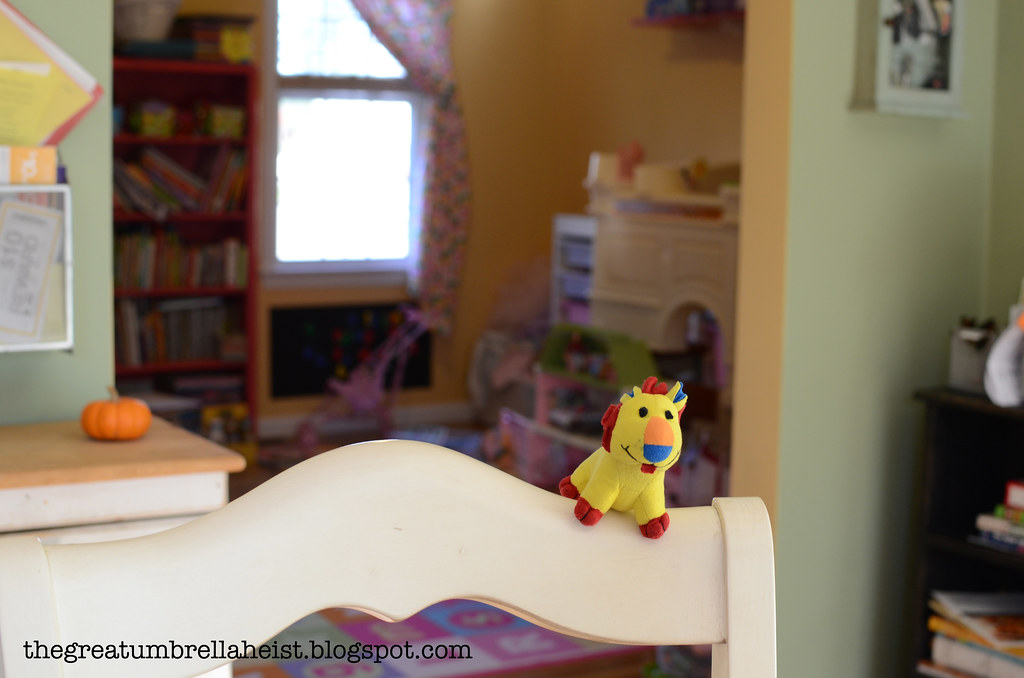
Suppose I needed to use a higher number for my f stop because I wanted more of the picture in focus and less bokeh. I would have to increase my ISO if I didn't want to (or couldn't) decrease my shutter speed.
ISO - 400
Aperture - f/4.5
Shutter speed - 1/60
I still want less bokeh....
ISO - 800
Aperture - f/6.3
Shutter speed - 1/60
What if I increase my f stop to 8.0?
ISO - 1600
Aperture - f/8.0
Shutter speed - 1/80
I hope that these examples show you how the triangle of ISO, aperture and shutter speed works. If you change one component, you will need to change another one to compensate for either the loss of light or the addition of light.
Here's a cheat sheet:
When you increase your ISO, you are increasing light but also increasing graininess.
When you increase your f stop, you are decreasing light and decreasing bokeh.
When you increase your shutter speed, you are decreasing light but increasing the ability to capture motion.
When you decrease your ISO, you are decreasing light and decreasing graininess.
When you decrease your f stop, you are adding light and adding bokeh.
When you decrease your shutter speed, you are increasing light but decreasing the ability to capture motion.
What is metering?
- With your camera on, set it to manual. On my Nikon, it is the M on the spin dial.
- Look through the viewfinder.
- At the bottom, you should see a meter. There is a zero in the middle with a + to the left of it and a - to the right of it.
- If your photo is underexposed, you will see a lot of little lines or marks to the right of the zero. If your photo is over exposed, you will see little lines or marks to the left of the zero.
- I always meter for my shutter speed. Turn the dial to change your shutter speed as you look through the viewfinder and watch the lines move to tell you whether you are over or underexposing your photo.
How do I decide my settings?
More often than not, I set my f stop first. Trust me when I tell you that it will come to you with time and practice. If I'm using my 35mm f/1.8 lens and I'm photographing the girls playing, I usually use an f stop of 3.5. For other situations and lenses, I usually have an idea of what f stop I would like to use.
I then assess the light and try to use the lowest ISO possible. Suppose we are outside and it is very cloudy and overcast, I'll probably start off with an ISO of 400.
I will then meter in my camera for the correct shutter speed. As long as the girls aren't running, a shutter speed of 1/160( which will show up as 160 on your camera's display) should be sufficient.
If the shutter speed is too slow - suppose my camera is telling me that my metered shutter speed is 1/100 - I'll have to decide whether to decrease my f stop or increase my ISO. In this case, I would probably change my f stop to 3.2, which will open the lens allowing more light in and increasing my shutter speed.
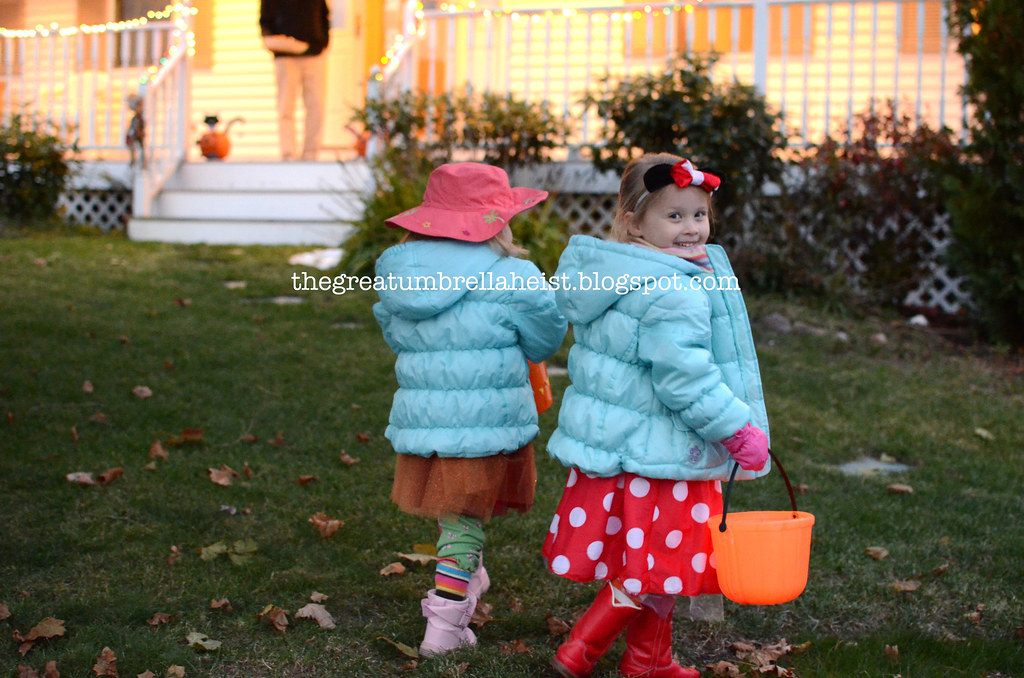
Let's take a real example of the girls trick or treating. When we stepped outside on Halloween, the sun was already hidden behind houses and trees and I was losing light fast. I first decided to set my f stop to 2.8. I bumped my ISO to 4000, which gave me a shutter speed of 1/100, which was slower than I would have liked but fast enough.
More often than not, I set my f stop first. Trust me when I tell you that it will come to you with time and practice. If I'm using my 35mm f/1.8 lens and I'm photographing the girls playing, I usually use an f stop of 3.5. For other situations and lenses, I usually have an idea of what f stop I would like to use.
I then assess the light and try to use the lowest ISO possible. Suppose we are outside and it is very cloudy and overcast, I'll probably start off with an ISO of 400.
I will then meter in my camera for the correct shutter speed. As long as the girls aren't running, a shutter speed of 1/160( which will show up as 160 on your camera's display) should be sufficient.
If the shutter speed is too slow - suppose my camera is telling me that my metered shutter speed is 1/100 - I'll have to decide whether to decrease my f stop or increase my ISO. In this case, I would probably change my f stop to 3.2, which will open the lens allowing more light in and increasing my shutter speed.
Let's take a real example of the girls trick or treating. When we stepped outside on Halloween, the sun was already hidden behind houses and trees and I was losing light fast. I first decided to set my f stop to 2.8. I bumped my ISO to 4000, which gave me a shutter speed of 1/100, which was slower than I would have liked but fast enough.
Why an f stop of 2.8? For the most part, lenses are not at their sharpest when wide open. So while I could reduce my f stop to 1.8, I don't because I don't want too soft of a picture. Depth of field, which I will explain in another post, plays a role in this as well.
My camera won't let me set my f stop to 2.8! This is where you need to understand the lens that you are using. If it is a zoom lens and says "f/3.5-5.6" on it than the lowest f stop is 3.3. If you are zoomed all the way out, your lowest f stop is 5.6.
Focus point(s)
Just a quick note that when you are shooting in Manual, you should be selecting your focus points. Do not let the camera decide what it should be focusing on!
Q&A
In Part I, Andrea asked how I prevent pictures from being blurry when there is low light and I leave the shutter speed for longer without using a tripod.
You need to have a steady hand or something to rest the camera on. I usually don't take low light, slow shutter speed photos because that's typically not what/when I am taking pictures. For night or really low light situations, I use my Speedlight whenever possible, especially if people are involved. For the night photos taken from my hotel room in NYC, I sat on the window seat and steadied the camera against my knees.
Coming up...
Yes, there's more. There will always be more. I think another important aspect to shooting in Manual is deciding on how your camera's meter should read the light. There are three options: matrix, center-weighted and spot. Stay tuned....
6 comments:
RE the Q*A-- you can also "freeze motion" by using your speedlight. A flash will freeze motion similarly to a fast shutter speed. If you like the amount of ambient light you have available but still need a little help freezing the motion, you set your aperture to 4.0 (ish) and your shutter speed to about 60. Using your flash (I have mine set to 1/8th power), you can still freeze the motion but not have an overly "flashy" image. :)
Thank you so much for this post, I'm bookmarking it right now, because I'm sure I will go back to it many many times!
I just bought my first DSLR in May and still feel completely lost, I haven't even tried to shoot in manual yet.
I would like to know more about your Speedlite, this might be a silly question, but how do you decide when to use it, do you ever use your pop up flash and what's important when buying one (I'm planning to buy one but have no idea what to look for). Sorry for all of my questions!
Thanks again, I love your blog!
Icannot thank you enough for posting all of this infomration. I bout my cannon DSLR in August and am still mostly shooting in auto. I think this will help me venture out! I ahve never commented before, but love following your bolg.
www.MezzadriTwins.blogspot.com
just got my DSLR (Canon EOS Rebel T3) been playing around with it already since I don't want to get stuck in auto!
It is going to take a lot of playing around before I can really just know what to set it at!
Thanks for the info!
Your two posts about shooting in manual have helped me tremendously! Thank you so very much! I love learning more so that I can take great pictures of my little guy. Thanks again!
Stephanie
OKay, so I did some try last week end and it wasn't good ... most of the pics are really dark ! I tried to change aperture, iso and shutter, or only one, or two but I didn't have the result that I wanted !
that's not easy ! but thanks for yout posts, at least I konw what is what
Post a Comment