
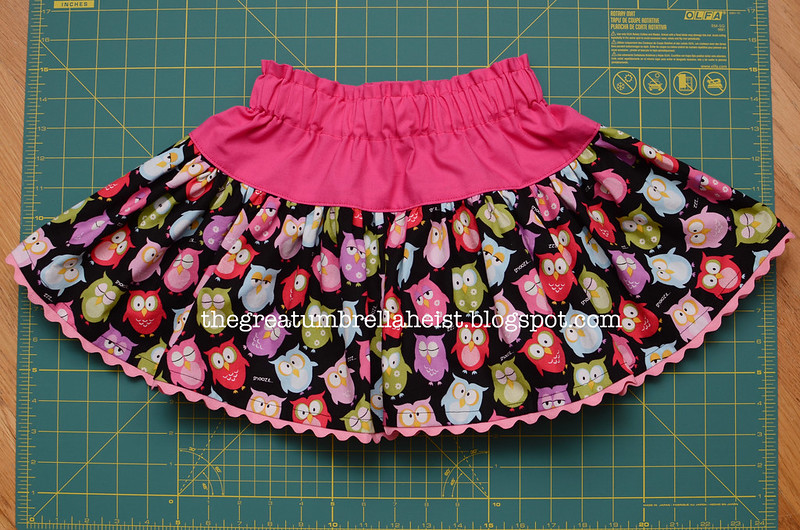
Over the past two years, I've made several different skirts and this particular style is definitely my favorite. (I just love the little ruffle detail at the top of the waist.) This pattern is completely customizable, which means you won't have to try to figure out which size pattern to use. All of the measurements will be based upon your little girl and the style you want to create. Not only is this pattern easy, it is extremely simple to modify into different styles. You can add tiers, change tier lengths, make it more full or less full. The possibilities are endless. In fact, I used this same pattern to make Emily's Tinker Bell skirt.

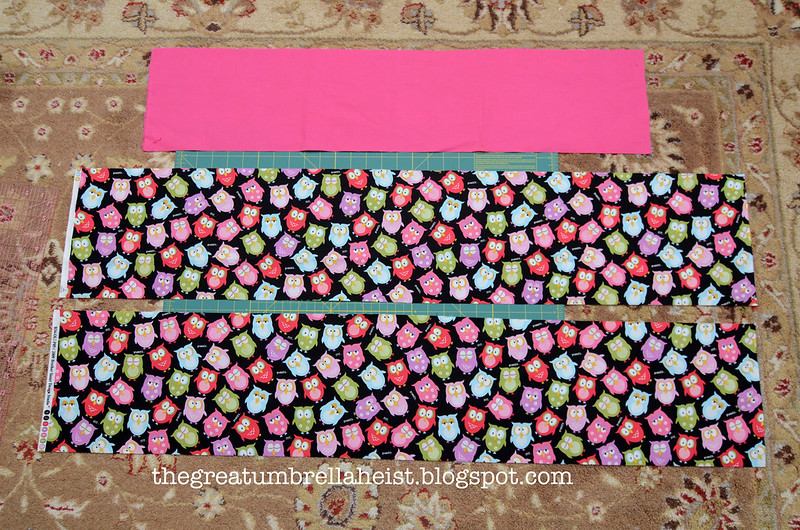
The basic pattern that I used to sew the owl skirt consists of only three pieces. How simple is that?
Now let's talk about how to determine and customize the measurements of those fabric pieces.
Step 1: Measure the child's waist.
To start, you will want to know the waist measurement of the child you are sewing the skirt for. Keep in mind that young children don't have waists like adults do. My kids still have little bellies after they eat and tend to wear their skirts down around their hips. You'll need to a fairly accurate measurement when you cut the elastic for the waist but for this first part, if you are off an inch, it isn't going to make a difference.
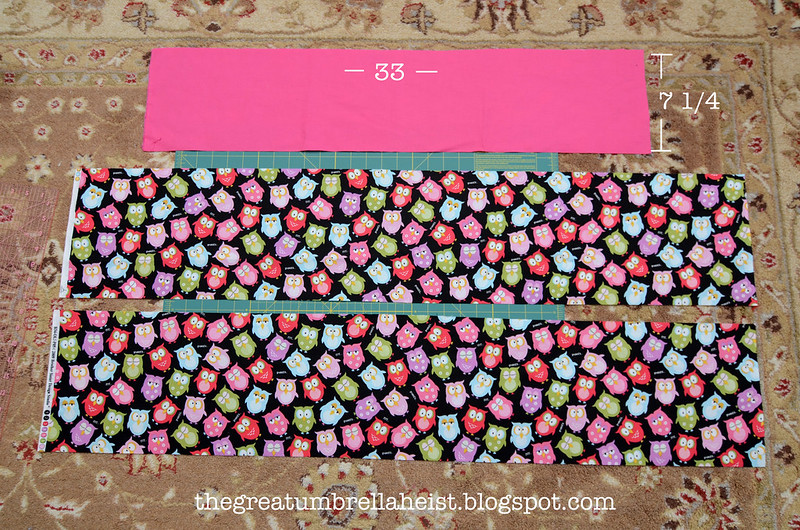
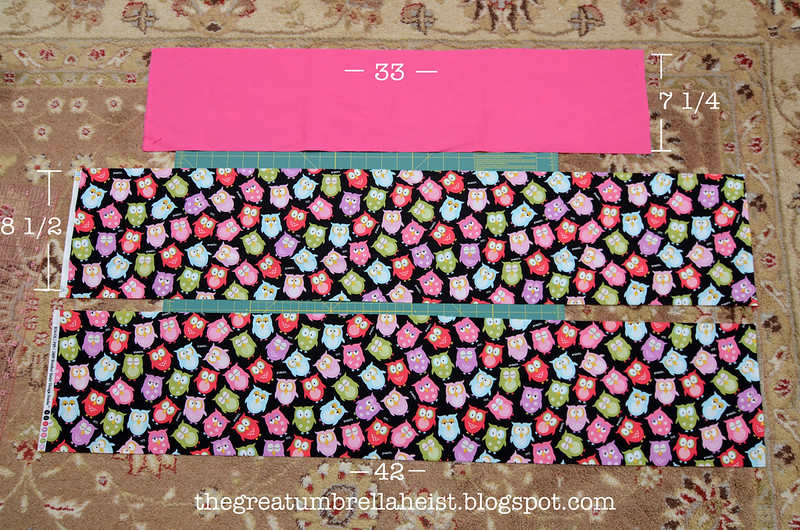
My girls' have "waist" measurements of approximately 20-21 inches so I cut the pink fabric 33 inches wide, which is about 1.5 times the waist. Again, you don't have to be exact here. The next step will outline how long to cut the waistband, which is the pink fabric.
Modification tip: You can also cut the waist portion to 2 times the waist measurement, which in this case would be about 40 inches, for more fullness and a different style.
Step 2: Decide how long you want the skirt to be.
I think it's easier to create a pattern if you know the desired measurements of the final product. I wanted this skirt to be on the short side at 11-12 inches. For the waistband, I knew that I was going to lose 5/8 of an inch for the bottom seam where I would be attaching the skirt and 2 1/4 inches for the elastic casing. I determined the measurement for the elastic casing through trial and error. For this skirt, that 2 1/4 inches will not change even if you lengthen the skirt or make the waistband wider or longer.
Here's a picture of the top portion of the inside of the skirt (in process) so that you can see why you need 2 1/4 inches for the casing.

(I do plan to post a tutorial on how to sew all the pieces together.)
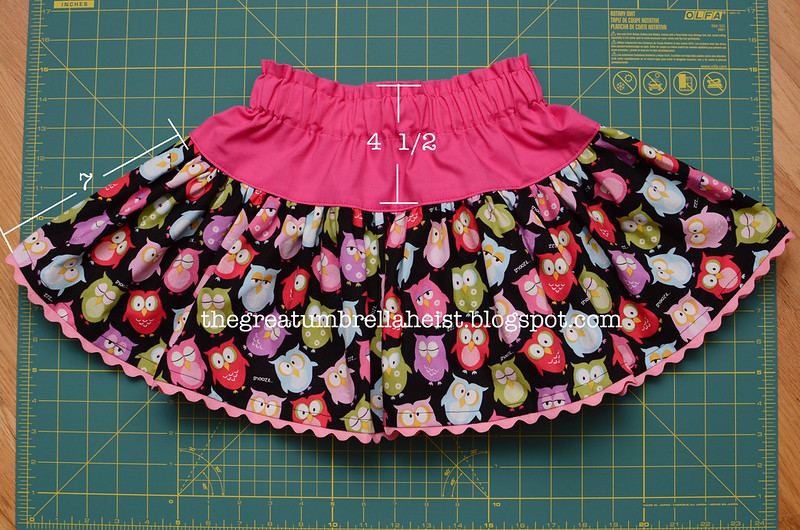
I cut the length of the pink fabric to 7 1/4 inches, which after deducting seam allowances (5/8 inch and 2 1/4 inches) leaves me with 4 3/8 inches length when the skirt is finished. You can round to 4 1/2 inches because, again, for this skirt, a quarter of an inch isn't going to throw anything off.

So if I want my skirt to be 11-12 inches long and I have 4 1/2 inches of length with the top (pink) portion, I need approximately 7 inches of finished skirt on the bottom. I know that I need seam allowances of 5/8 of an inch to attach the bottom (owl fabric) to the top and about an inch for a bottom hem so I cut the owl fabric 8 1/2 inches long, which will give me a finished product of approximately 7 inches.
Step 3: Decide how full (or twirl-able) you want the skirt to be.
If you are new to sewing, it's a good idea to keep a ratio of 1.5 to 2.5 between skirt tiers or ruffles. This is a generalization, of course, and there are always exceptions. So if you have a skirt with 2 different tiers or layers and the first tier (waistband) is 40 inches wide, you would want the next tier to be between 60 and 100 inches wide. Make sense?
Most fabrics are about 42 - 44 inches wide. For this skirt, I simply cut straight across the entire width. Once both pieces are sewn together, I will end up with a tier that is about 84 inches wide, which is 2.5 times the waistband (or first tier) width of 33 inches.
Tips for cutting fabric
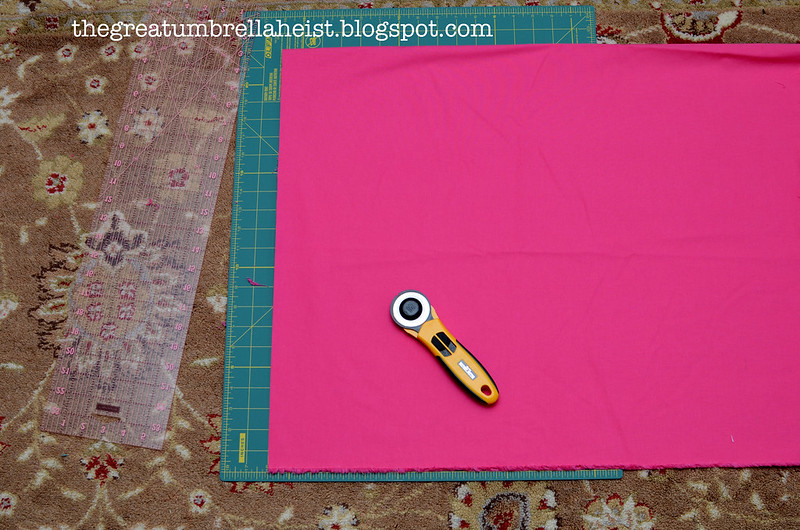
While you don't need a rotary cutter and mat, they certainly make cutting fabric much easier. You should also have a pair of scissors specifically and only for cutting fabric. And you should keep those scissors in a designated spot (aka hidden) so that your husband, boyfriend or significant other doesn't use them to cut through the packing tape on three boxes of crib parts.
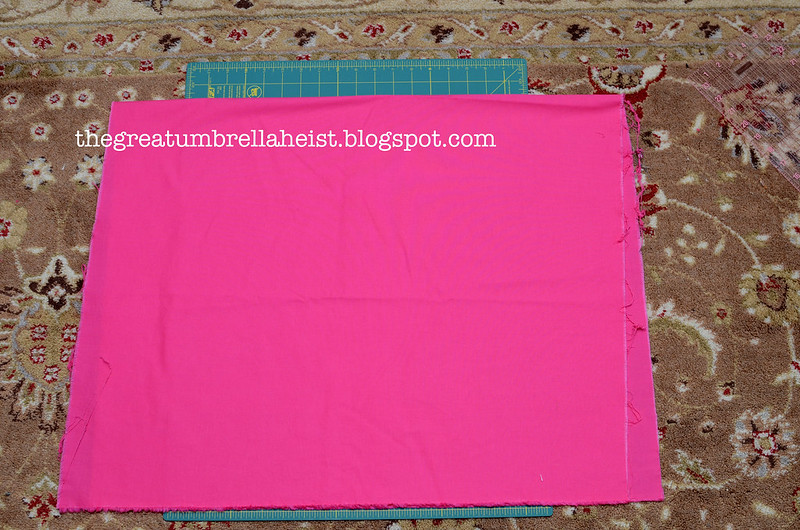
I always wash and dry my fabric before I use it. Believe me, some fabrics shrink and that's the last thing you want to happen when you are sewing clothes. I also iron it before cutting my pattern pieces.
Don't assume that the fabric store has cut your fabric in a straight line. I always make a fresh cut before I begin cutting skirt pieces. I think the easiest way to do this is to fold the fabric in half and line up the selvages (the edges that do not fray.)
Ironically enough, the store cut on this piece of fabric was terribly crooked.
You can really see it if you look at the right side.
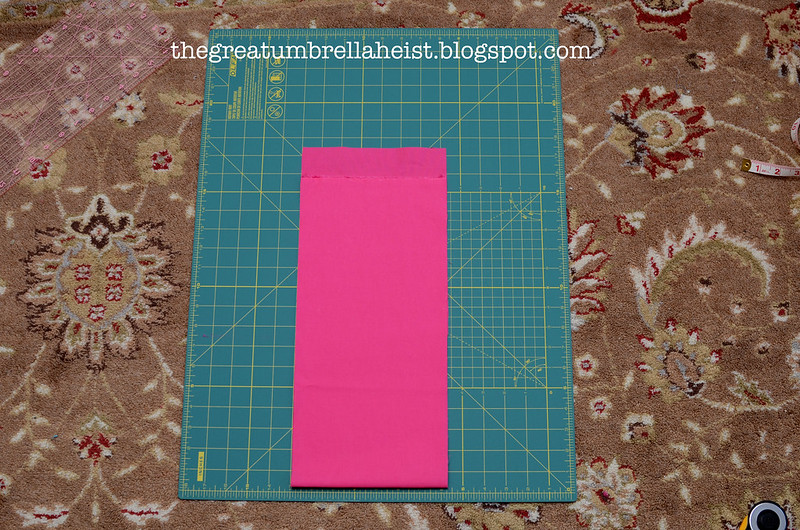
Here's what it should look like.
When you are cutting fabric pieces that are essentially just blocks, the ends should line up when you fold them in half. This is the waistband piece. Do you see how both ends are the same exact length?
Stay tuned for a tutorial on how to sew the pattern pieces together!
9 comments:
Thank you, Sarah! I am so excited to try this. You inspired me to sew my daughters first birthday dress and I am hoping to make her (and maybe her cousins) a twirl skirt for Disney this summer :)
Thank you so much for this post! I'm sending this to my mom (she's the sewer, not me!). Where did you find that owl fabric? (Sorry if I missed where you mentioned it!)
Thanks for sharing :) I can't wait to read more!
That is precious! if only I had the sewing genes! You should "pin" this
I love love love this skirt!
Thanks, everyone!
I found the owl fabric at Hobby Lobby in MI about 18 months ago.
I'm having pinterest problems (sigh) so whenever I try to pin something, the picture is there but then it goes away.
You know, I can follow your technical photography posts like they're nothing, but this sewing stuff? It might as well be in Greek. I used to own a sewing machine but when it came down to it, I remembered why I was glad to get a C+ in Home Ec. yeesh :/ You do great work, you're so lucky you learned how!
The timing on this tutorial couldn't be better. I'm making a skirt for DD 2nd birthday tonight!
I love this skirt, I am really bad with determining measurements. I would love to make this for an infant in fact she isn't born yet, not until March 2014. Do you have measurements I could use for a newborn.
Thank you, this skirt is beautiful
Post a Comment